As the NYT’s Amanda Cox has said in some of her talks , annotating a visualization is one of the most important, but also one of the hardest things to do. In this post, we won’t tackle the ‘what’ to annotate, but an example of the ‘how’ to implement an annotation layer that needs to change as a user progresses through a visualization. Here’s what we will be building
The code for this example is on github . Each build of this process is broken up into its own folder.
We will look at implementing this using jQuery, and then as a bonus, a D3.js only implementation.
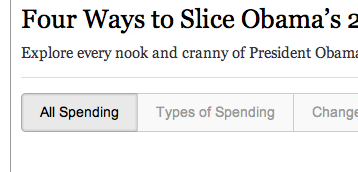
According to Amanda’s Eyeo 2012 talk (which I saw streaming, but don’t know if it’ll be up anywhere), the New York Times graphics department calls this type of interactive element a Stepper. A great example of a stepper can be found in the previously discussed Obama 2013 Budget Proposal visualization.
As the user clicks on each step of the stepper, the visualization changes - along with its annotations. This allows the visualization to focus on different points of the data presented at each step, and bring the viewer through the entire “story” of the data.
Before we get started, let me say that everything presented in this demo is pretty basic html and javascript. I just wanted to have a concise example of one way to implement a stepper for web-based. That being said, if you aren’t too bored already, then let’s get started!
Overview
The method I will present here is largely based on the implementation shown in the Obama Budget visualization. There are dozens of ways this kind of stepper could be implemented. Here are some pros to this process:
Keeps the annotations as html
This allows for easier editing and styling via css.
Uses jQuery to switch between annotation steps
Odds are you have some familiarity with this framework.
Pretty simple implementation
Nothing too crazy going on, just a few commonly used html/javascript features.
So the basic steps we will follow will be to:
- Create the step annotations in html
- Style them using css
- Transition between them using jQuery
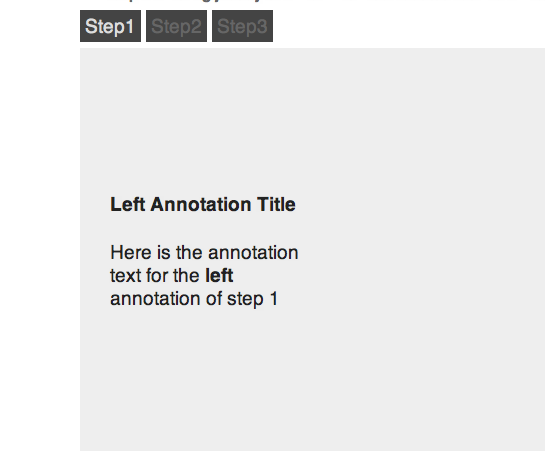
The Annotation Html
Each step will have its own div, with a unique id, and a class identifying it as a step div. Inside this div, each chunk of annotation text can be separated in its own div for positioning.
Importantly, all the step divs should be wrapped in a container div. The reason we will see in a minute.
The stepper nav links can be built out of an unsorted list, like any other navigation control.
A simple example would look something like this:
Our vis-container div wraps the entire visualization. The annotation sets for each step are contained in their own div with an .annotation-step class, and all annotation steps are children of #annotation-steps.
The #vis-canvas div would be where the actual visualization would be created.
If we were to stop now, here is what it would look like
The CSS
So far our annotation layer isn’t very impressive. The text for all the steps are visible at the same time, and they go down the page instead of being stacked on top of one another. Let’s look at the minium amount of css that is required to get our annotation layer looking right.
The main trick used to get positioning how we want it is absolute positioning inside a relative div . Like the link states, when absolute-positioned divs are inside a relative-positioned div, we can specify the exact location of these absolute divs within their parent div. Meaning, we don’t have to worry about positioning our annotations relative to the entire body of the page (which would get pretty annoying every time a little change was made).
For our .annotation-step divs, we want them all to stack on top of one another. Thus, using just position: absolute; should do the trick. It will absolutely position the div at the top of its relative parent.
For our specific blocks of text within the annotation, we can use absolute positioning, along with the left/@top@ styles to define exactly where each should go inside its annotation-step. You wouldn’t want to write an entire site using absolute positioning, but this method provides the kind of precision you want for where your annotation goes. Also, if you have better ways to position elements like this, let me know!
We finish off with some z-index to ensure the annotation layer and stepper controls are on top of the visualization.
Our basic stylings now look like this:
The comments in the code should let you follow what is going on.
Note that we have hidden all the .annotation-step divs, but we would like to start by showing the annotations for the first step. This can be done by adding style="display:block;" to the html of the first step’s div. This overrides the display:none; in our css file.